Sign In and Onboarding Guide: Get Started | Sendpaper

This guide walks you through sign-in and onboarding with Sendpaper so you can start sharing documents or setting up a data room. We cover sign-in options (Google and email magic link), creating your organization with a document storage region, and choosing how to get started. No account is needed to view a shared link; this guide is for people who want to create and manage links and data rooms.
1. Sign In to Sendpaper
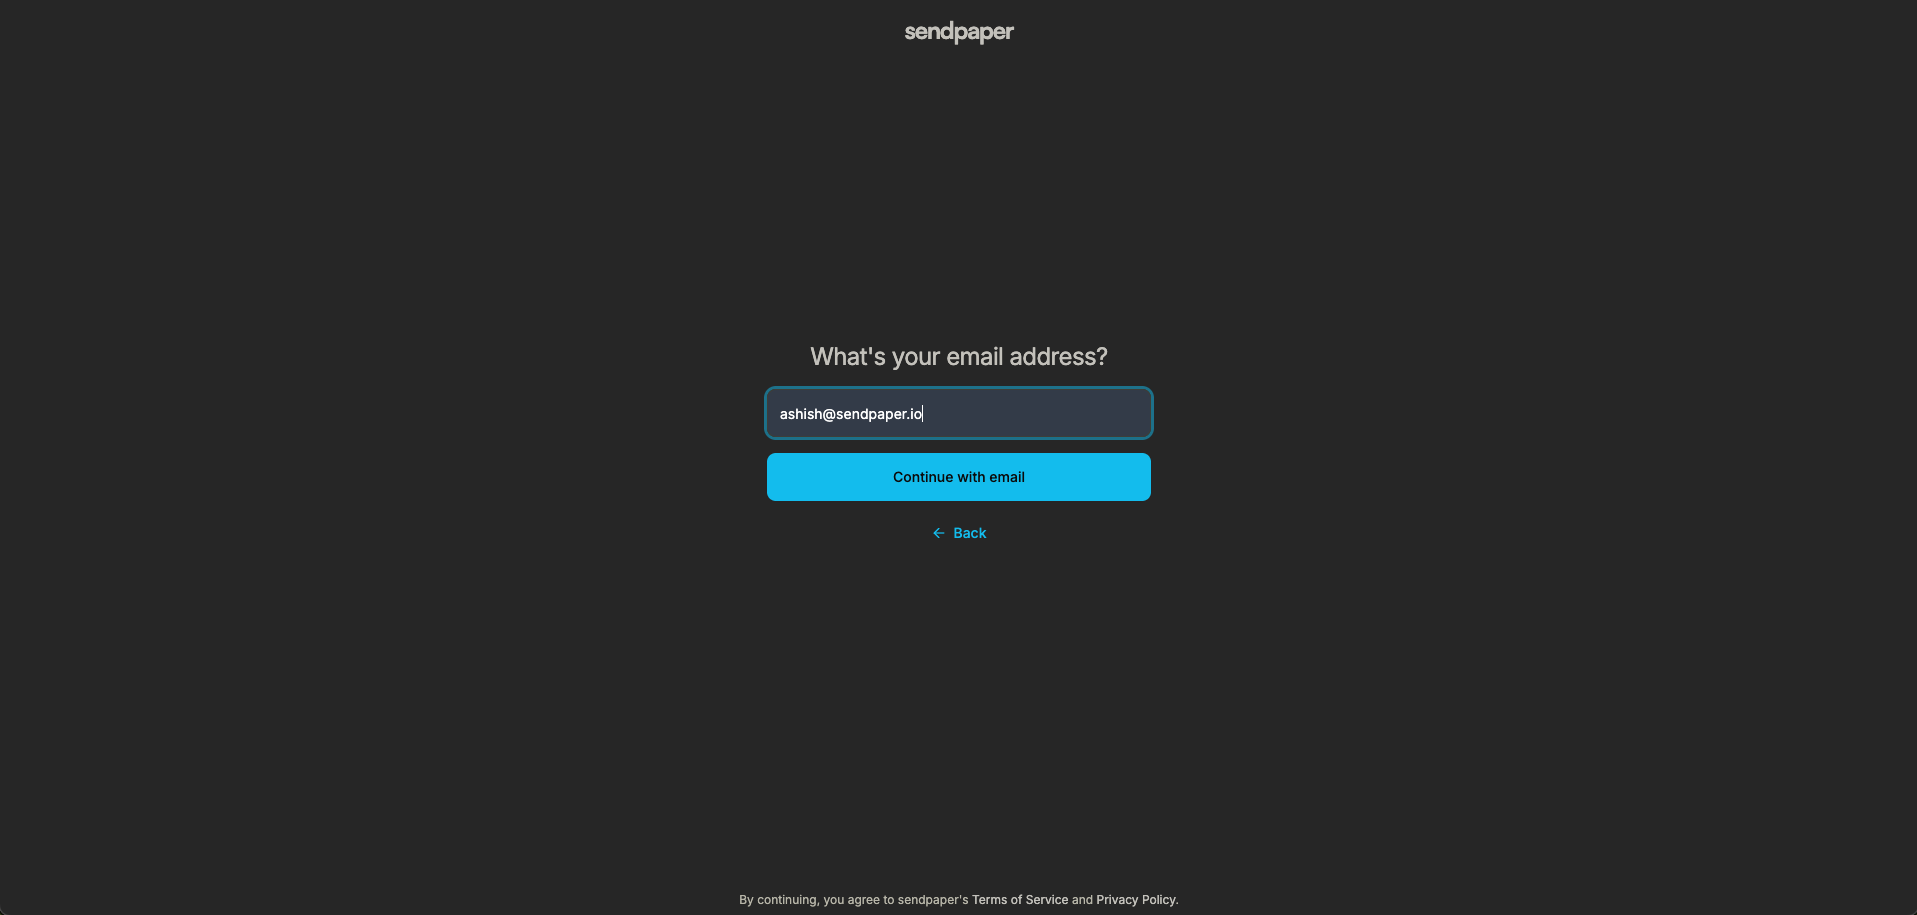
Go to the Sendpaper app and you will see the sign-in screen. You can sign in two ways:
- Sign in with Google - Use your Google account to sign in with one click.
- Continue with email - Enter your email address and we send you a magic link to sign in without a password.
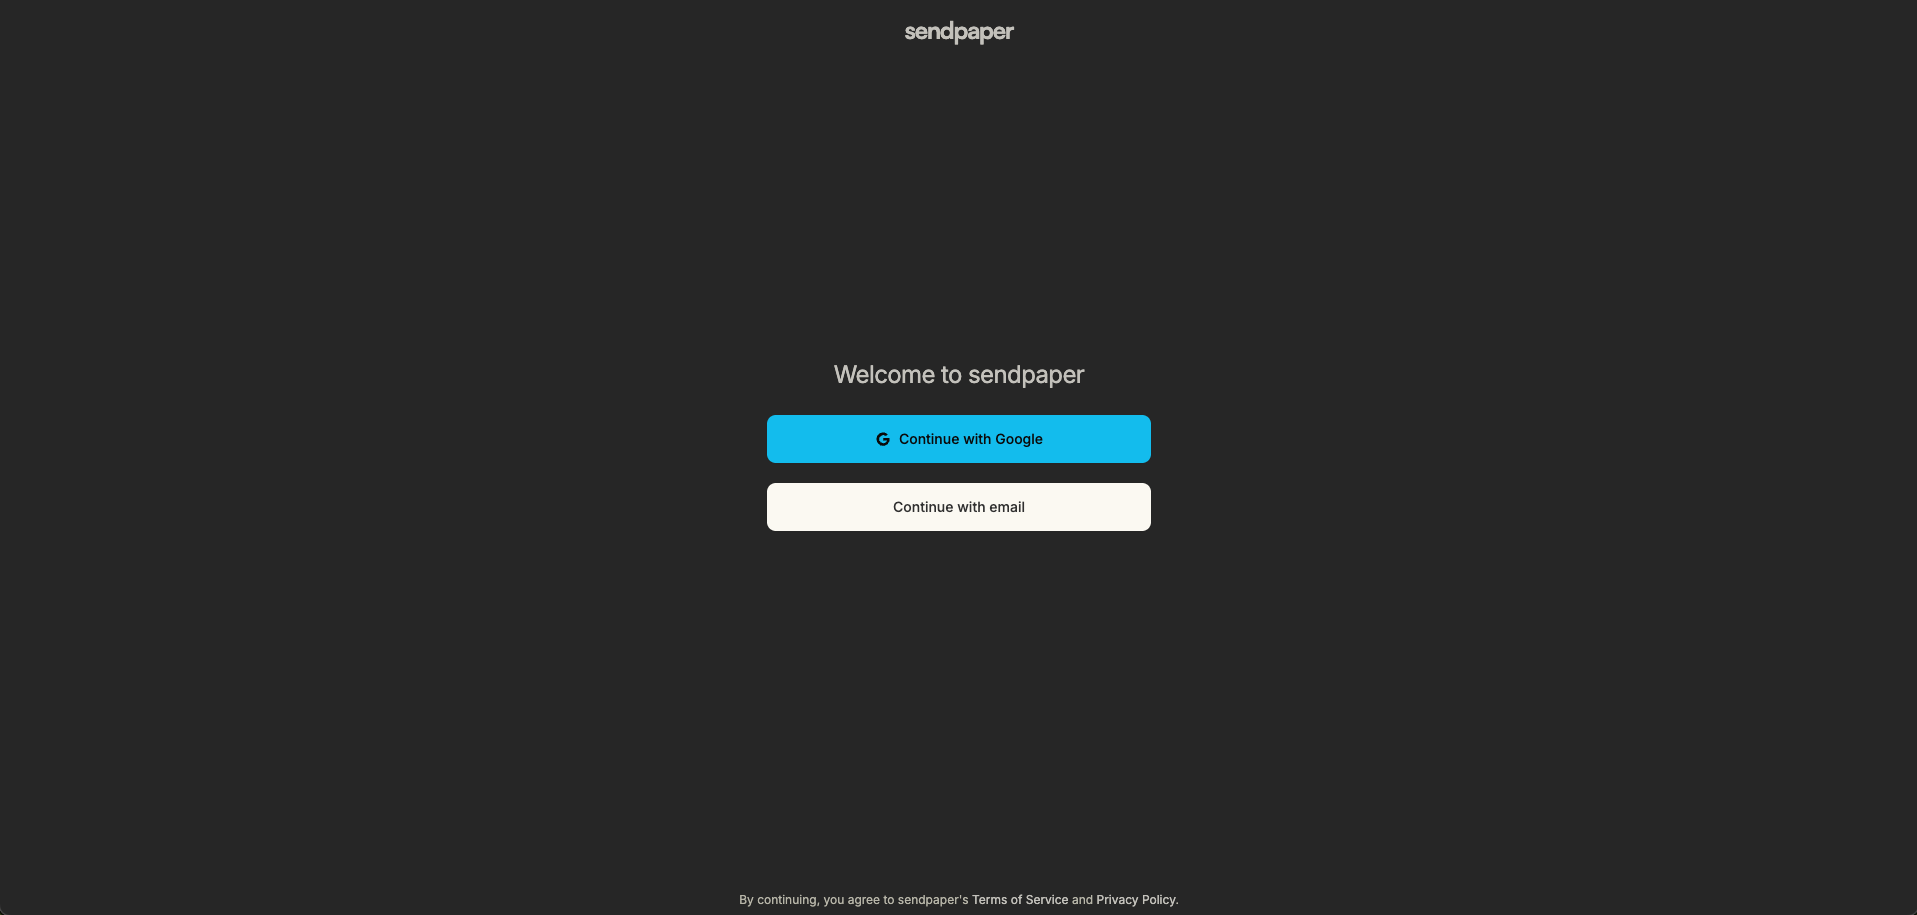
Choose the option you prefer. If you are new, you will create your account as part of this flow.
2. If You Use Email: Check Your Inbox and Confirm Sign In
When you continue with email, we send a magic link to the address you entered. You will see a screen asking you to check your email.
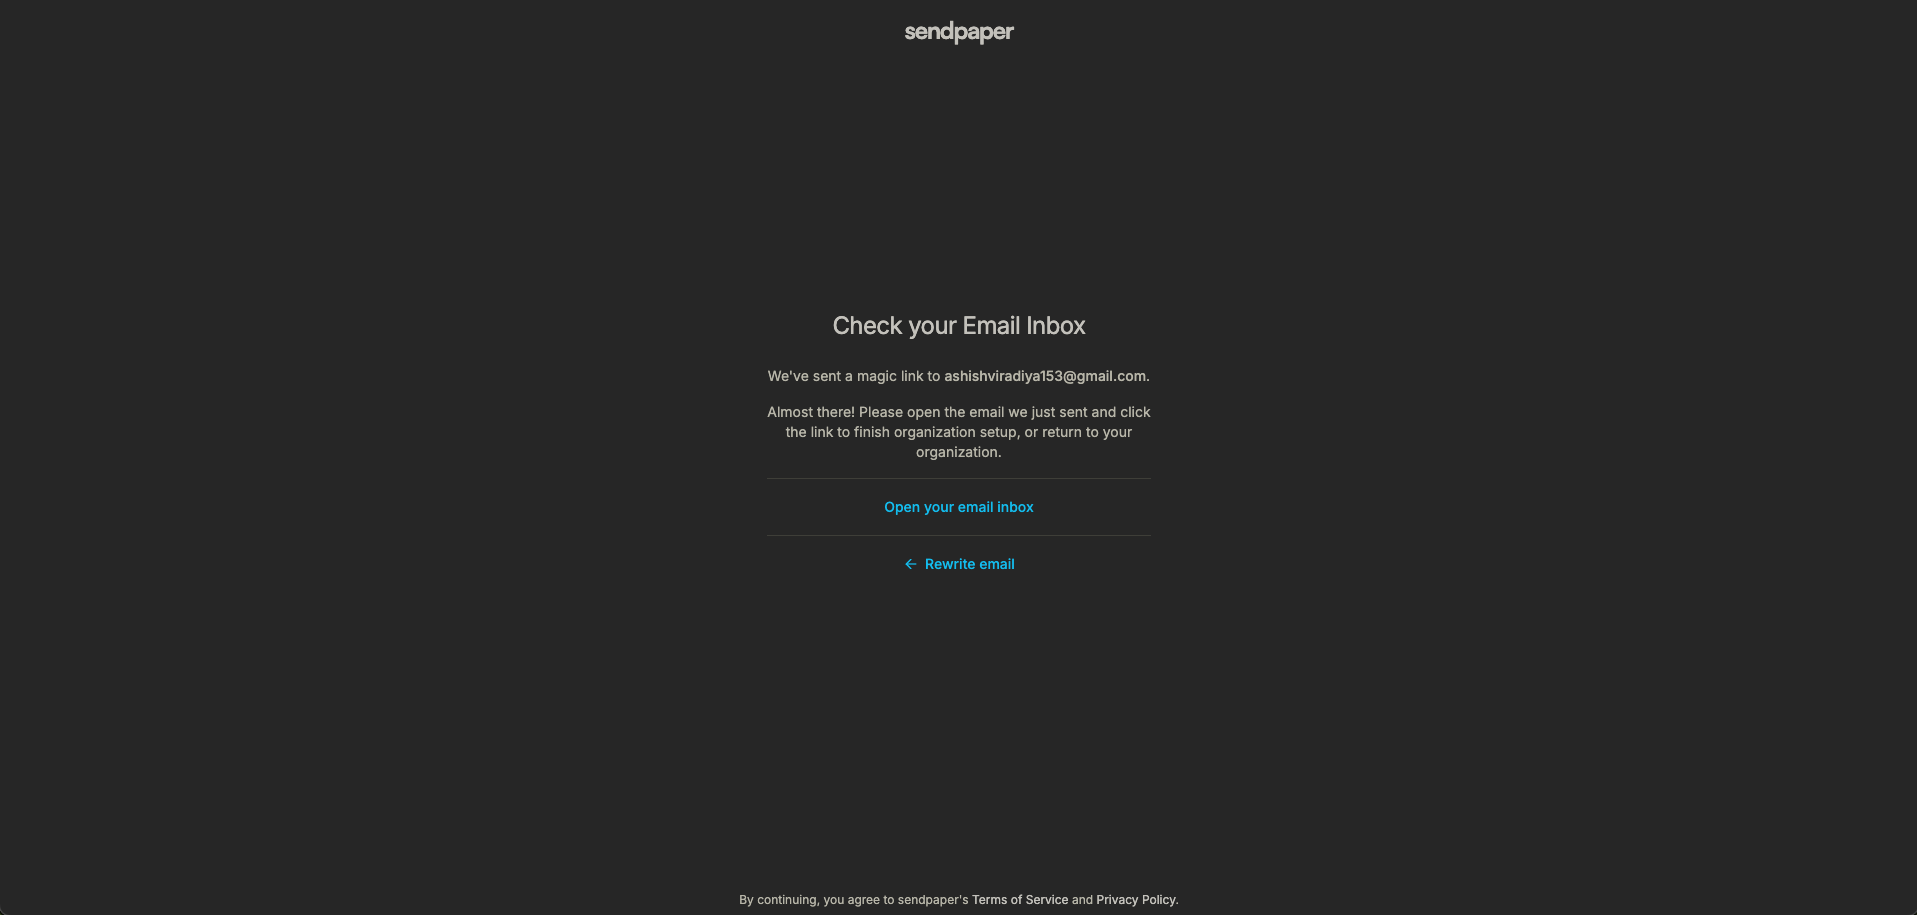
Open your inbox, find the email from Sendpaper, and click the link. You will then see a confirmation screen. Click Complete sign in to finish. After that, you are signed in and will be taken to the next step (create organization or dashboard, depending on your account state).
If you do not see the email, check spam or promotions. You can request a new link from the sign-in page if needed.
3. Create Your Organization
After you sign in for the first time, you create an organization. This is your workspace: all your documents and data rooms belong to an organization, and you can have more than one later.
On the Create a new organization screen you will enter:
- Organization name - A name you recognize (e.g. your company or team).
- Organization URL - A unique slug for your workspace (e.g.
acmeso your workspace URL issendpaper.app/acme). We suggest one from your organization name; you can change it if the URL is available. - Industry type - Optional; helps us tailor the experience.
- Document storage region - Where your documents and data room files are stored. We suggest a region based on your location; you can pick another for data residency and compliance. The region applies to all documents in this organization.
![]()
Click Create Organization. Once the organization is created, you are taken to the next step so you can choose how to get started.
4. Choose How to Get Started
You will see a short onboarding step that asks what you would like to do first:
- Share a document - Upload a document (e.g. a PDF) and create a link to share it. Good for pitch decks, one-off files, or secure PDF sharing.
- Create a data room - Set up a data room to organize multiple files and folders and share one link with access control and granular permissions. Good for due diligence, fundraising, or any multi-document deal.
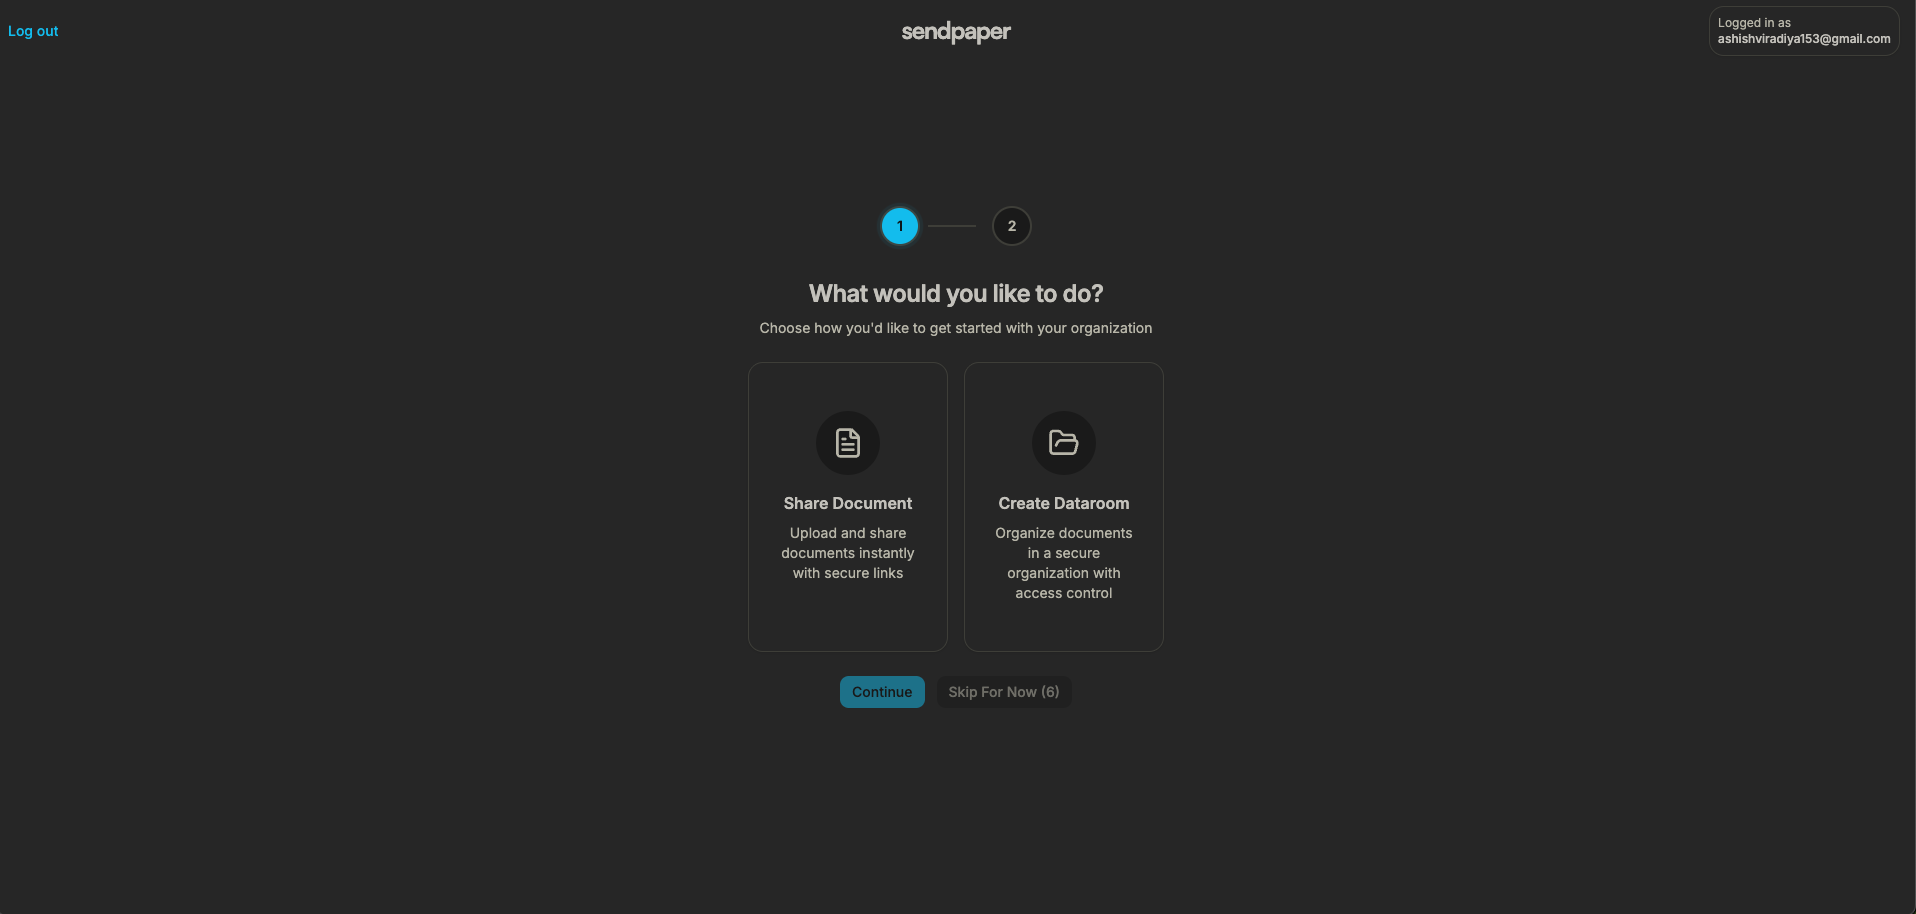
Pick one to continue. You can always do the other from your dashboard later.
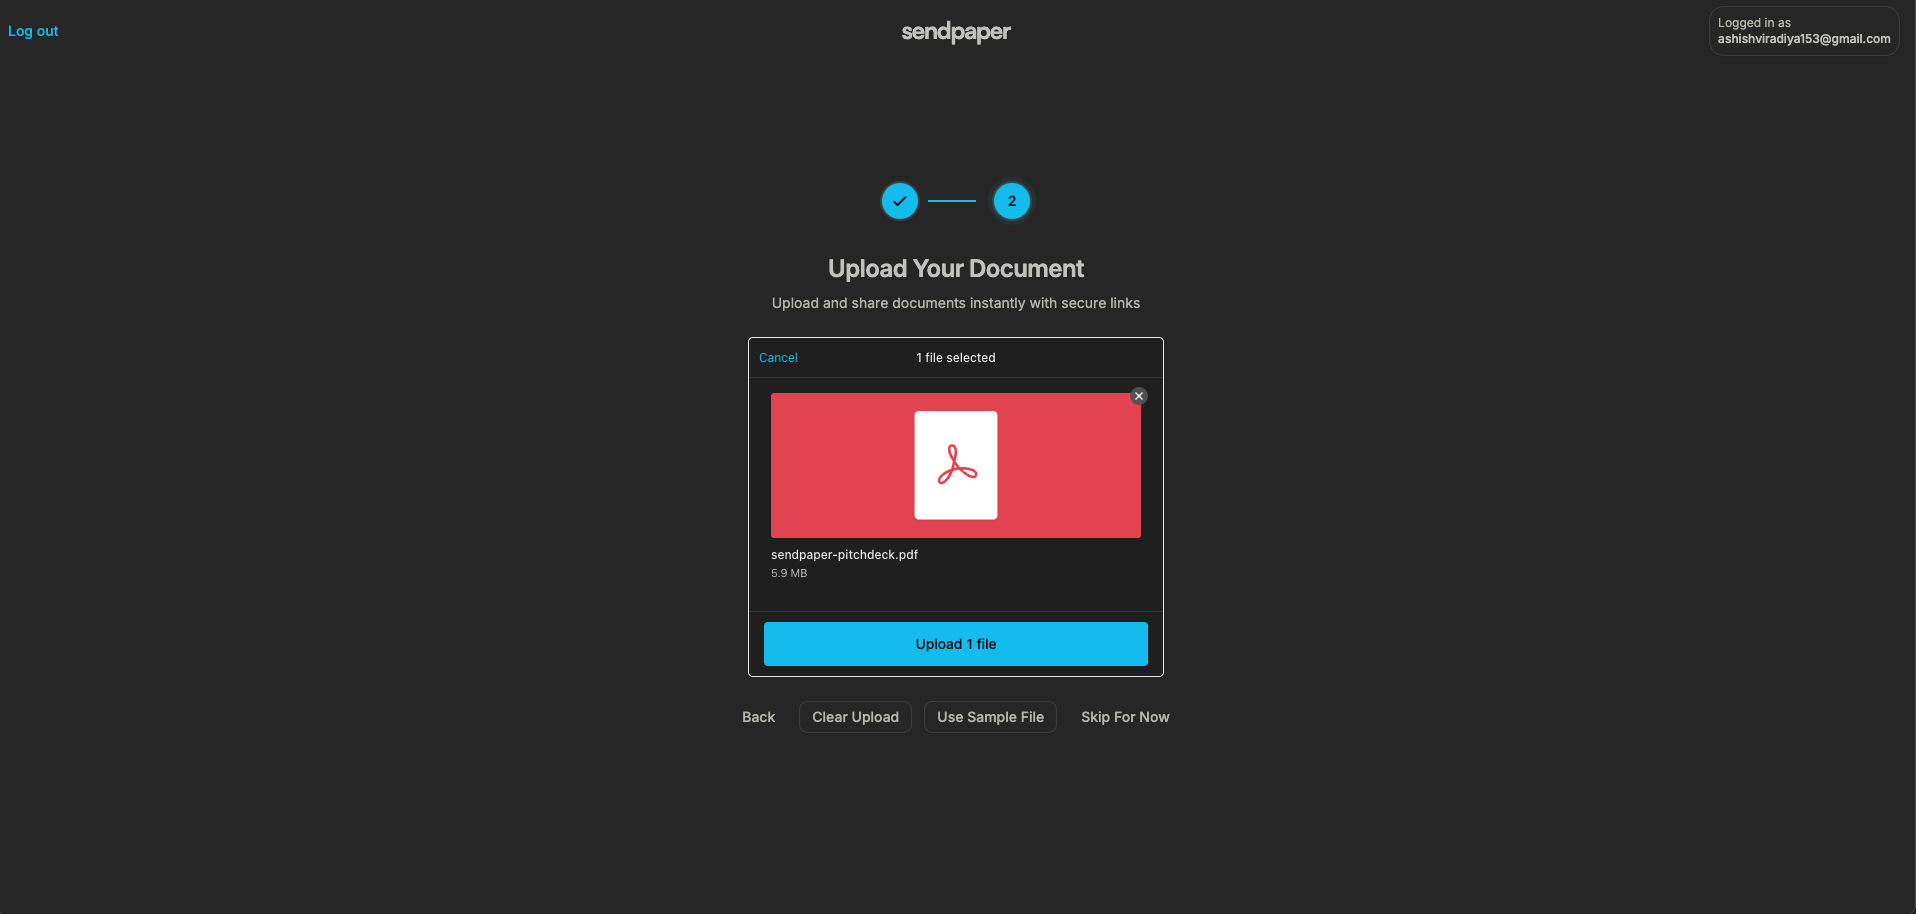
5. If You Chose “Share a Document”: Upload Your First File
When you choose to share a document, the next screen lets you upload a file. Drag and drop a file or click to browse. We support PDF, Office, images, video, and more. After the upload finishes, you can create a link for that document, set access control (password, expiry, email), and share the link.
You can also skip uploading here and go straight to your organization dashboard to upload or create links later.
6. If You Chose “Create a Data Room”
When you choose to create a data room, you can start a data room trial. You will be guided to activate the trial, create your first data room, invite team members, then add folders and files and set granular permissions and link settings. For a full walkthrough, see Start your data room trial: step-by-step guide. From the dashboard you can manage multiple data rooms and control who sees what.
What Happens Next
After onboarding you land in your organization dashboard. You can share your first secure link or open your data room within minutes. From there you can:
- Upload documents and create document links with watermarking, screenshot protection, and view-only.
- Create and manage data rooms with folders, permissions, and audit logs.
- Set access control on every link: password, expiry, email allow/block list, and notifications.
- Invite team members and manage your organization from settings.
If you already have an account and sign in again later, you go straight to your organization (or organization list) and can switch between organizations if you have more than one.
Frequently Asked Questions
Related posts
- Product, GuidesData Room Groups: One Place for Permissions and Analytics | SendpaperUse data room groups in Sendpaper to manage permissions and analytics for investors, buyers, and teams. Create a group once, reuse it on links, and see group-level activity without spreadsheets.
- Product, GuidesHow Sendpaper renders files as images in the viewer (and why it matters) | SendpaperLearn how Sendpaper converts uploaded PDFs into page images for a fast, consistent viewer. We cover what formats can be shown, what processing means, and why a loader appears.
- Product, SecuritySecure PDF Document Sharing: Watermarking, Screenshot Protection, View-Only | SendpaperShare PDFs securely with watermarking, screenshot protection, view-only, and one-click agreement. Password and access control in Share Link and Access Control. One sidebar, all options.