Start Your Data Room Trial: Step-by-Step Guide | Sendpaper

Pick Create a data room during sign-in and onboarding. After that, you can start a data room trial.
This guide shows each step. You will activate the trial, create your first data room, invite team members, and then set up what you need next. You get 7 days of full access, so you can test granular permissions, access control, and more before you decide.
What the Data Room Trial Includes
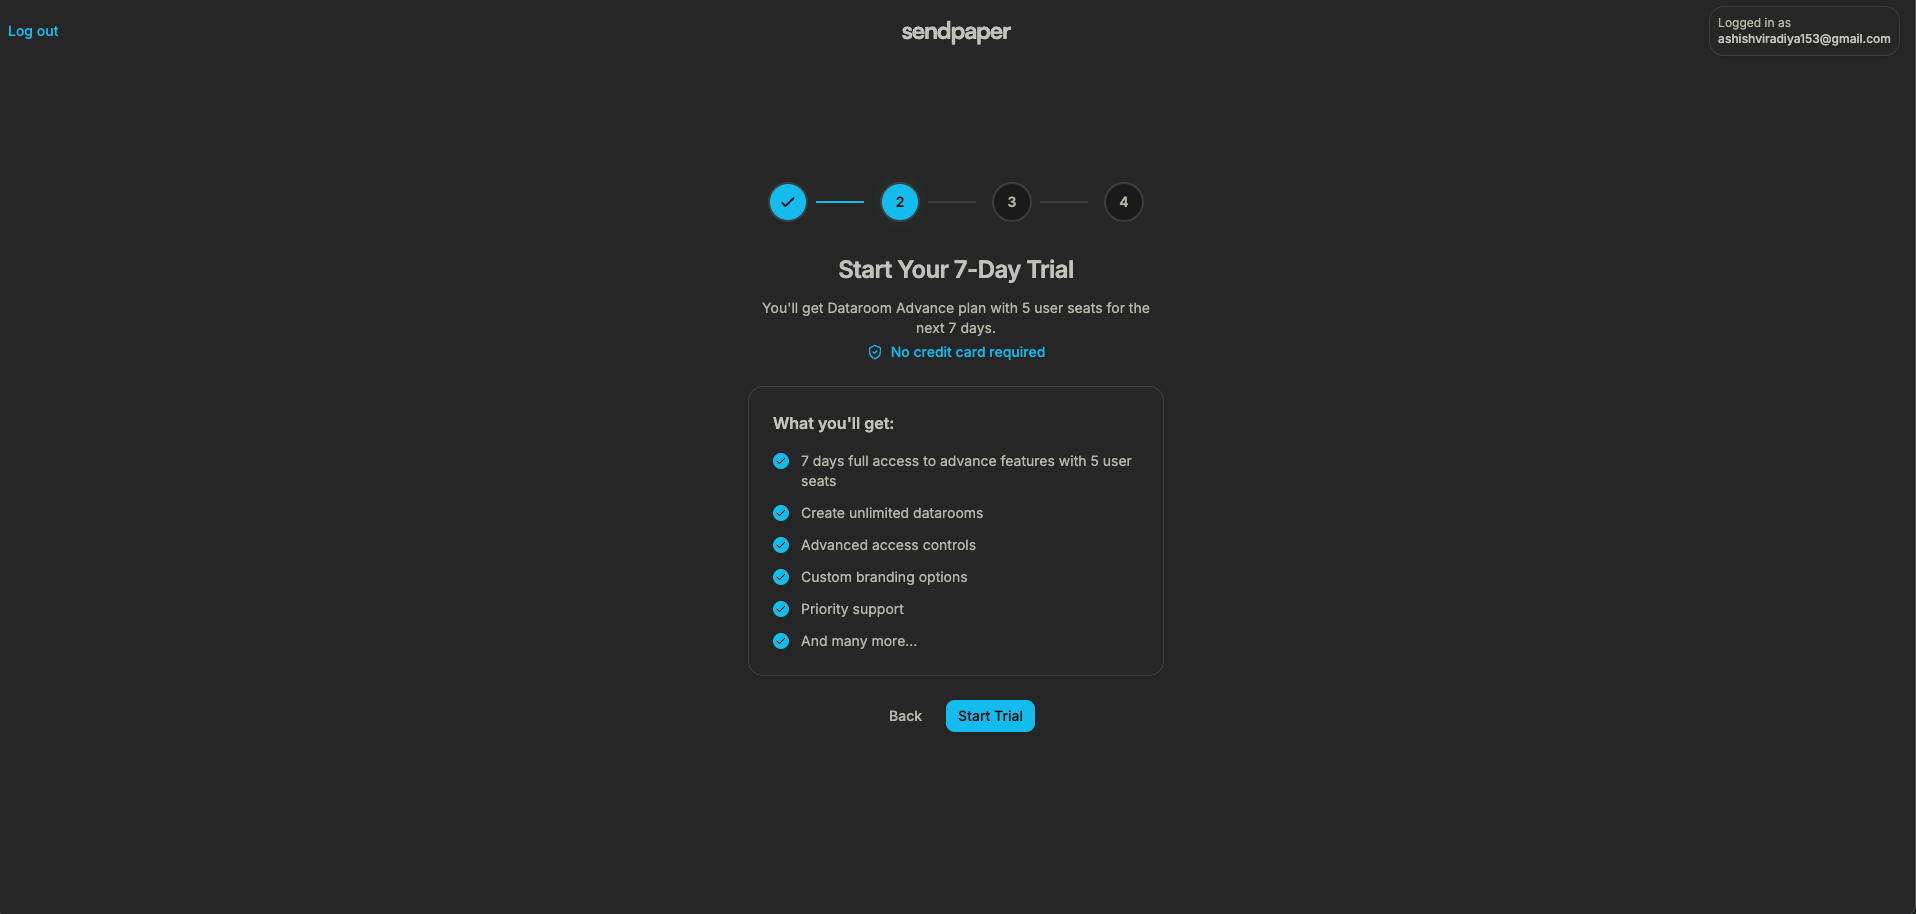
When you start the trial you get:
- 7 days of full access to data room (Dataroom Advance) features.
- 5 user seats so you can invite team members to your organization.
- Unlimited data rooms so you can create multiple rooms for different deals or processes.
- Advanced access controls - password, link expiry, email allow/block list, and view-only on links.
- Custom branding so shared links and the viewer experience match your company.
- Priority support during the trial.
After the trial, you can subscribe to a plan to keep access. Or you can continue on the Free plan with document links and limited data room use, as listed on Pricing.
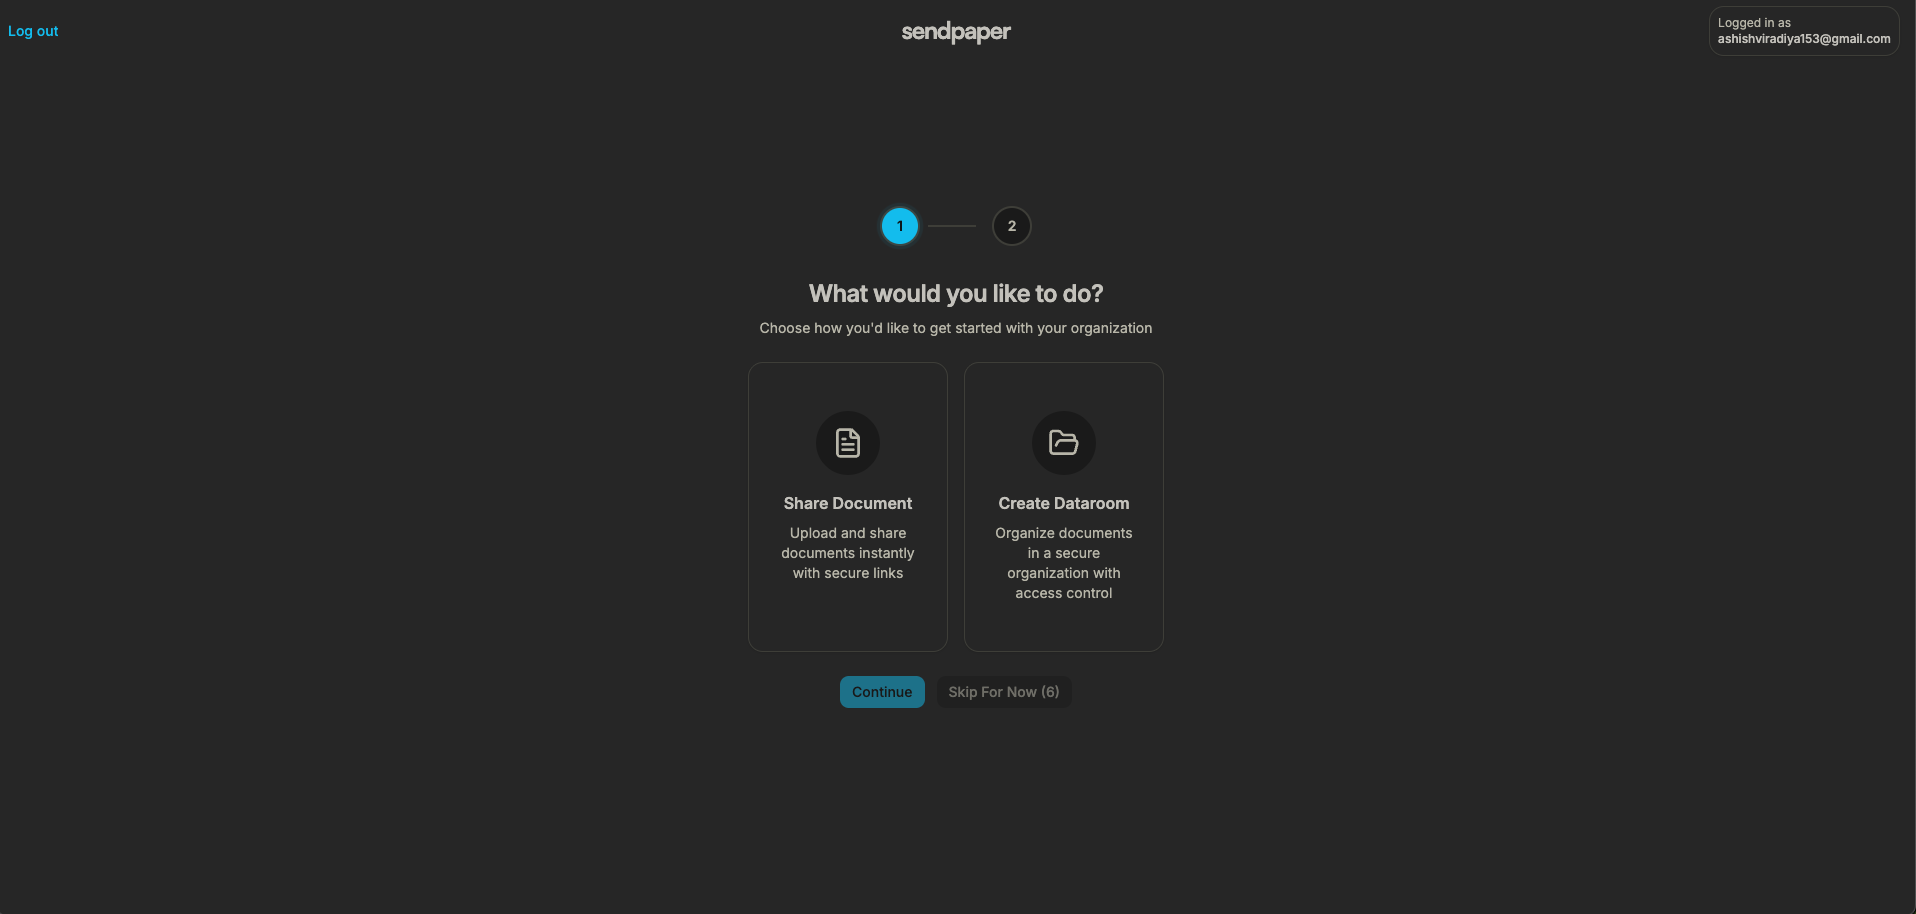
1. Choose Create a Data Room and Start the Trial
After you sign in and create your organization, you see a step that asks how you would like to get started. Select Create a data room.
Next, you see the trial activation screen. It summarizes what you get: 7 days, 5 user seats, unlimited data rooms, advanced access controls, custom branding, and priority support.
Click Start trial. Your 7-day trial starts right away. No credit card required.
2. Create Your First Data Room
Once the trial is active, create your first data room. You will be asked for a data room name, for example: "Series A due diligence" or "M&A - Acme".
Enter a name and click create. The data room is added to your organization, and you go to the next step.
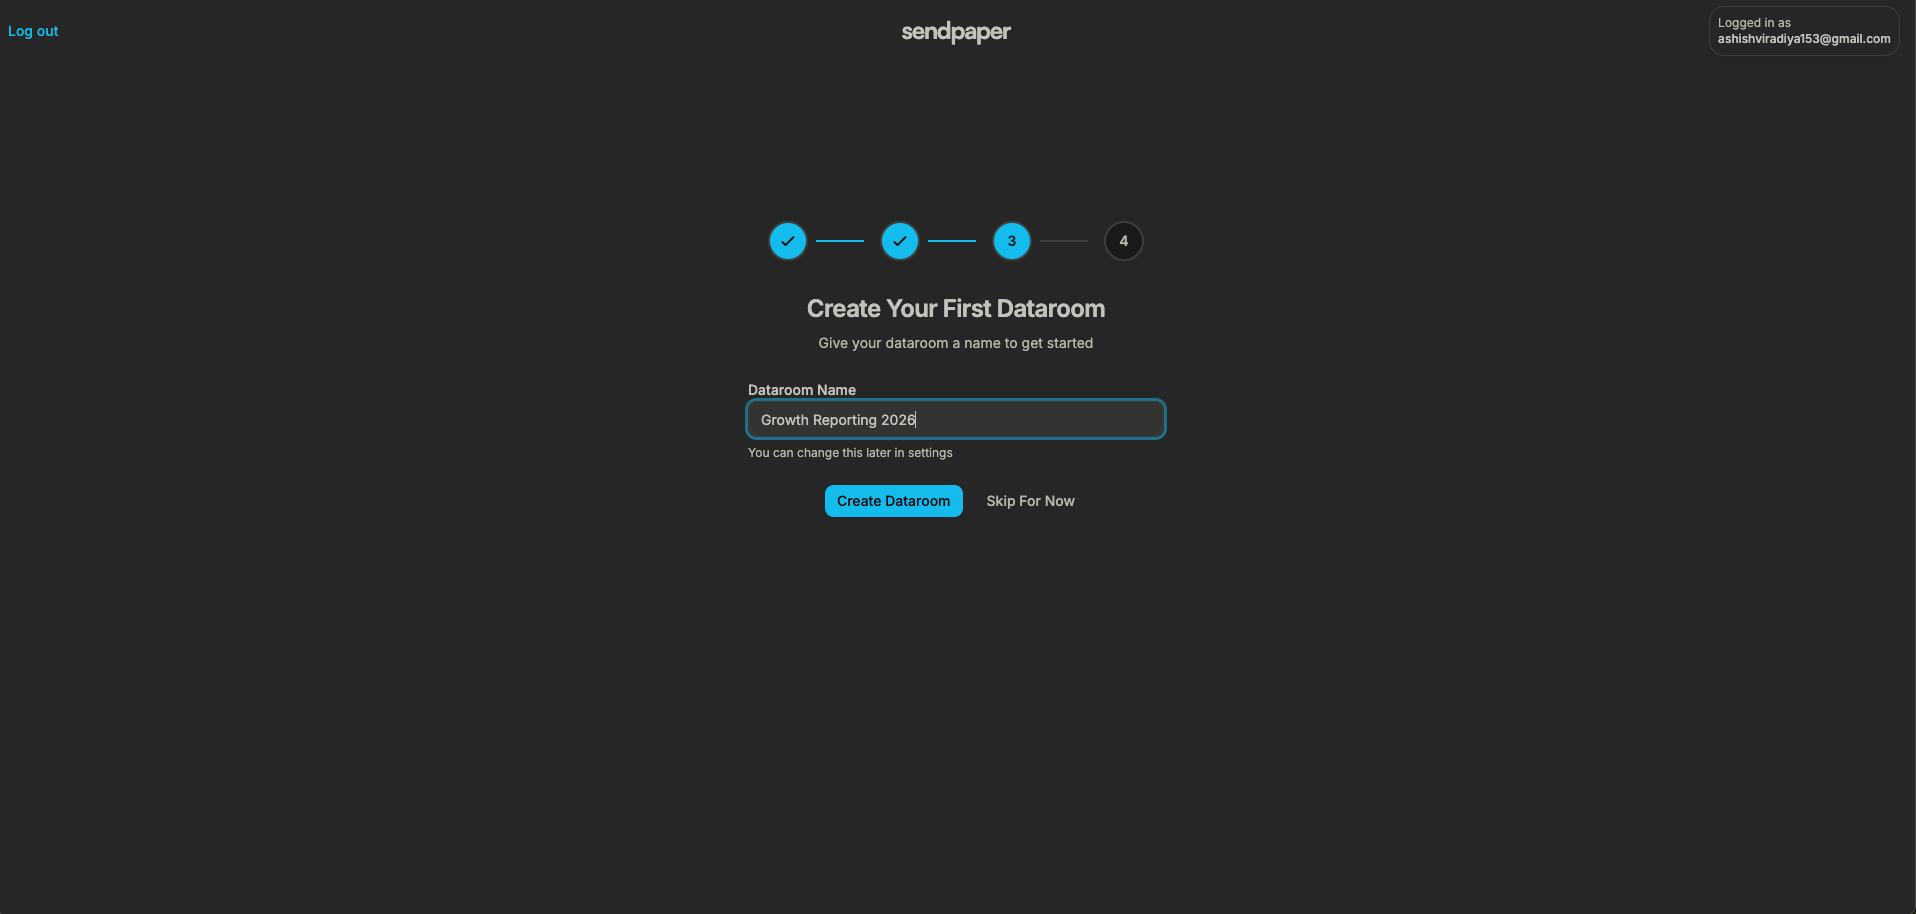
You can create more data rooms later from your dashboard. Each room can have its own folders, files, and link settings.
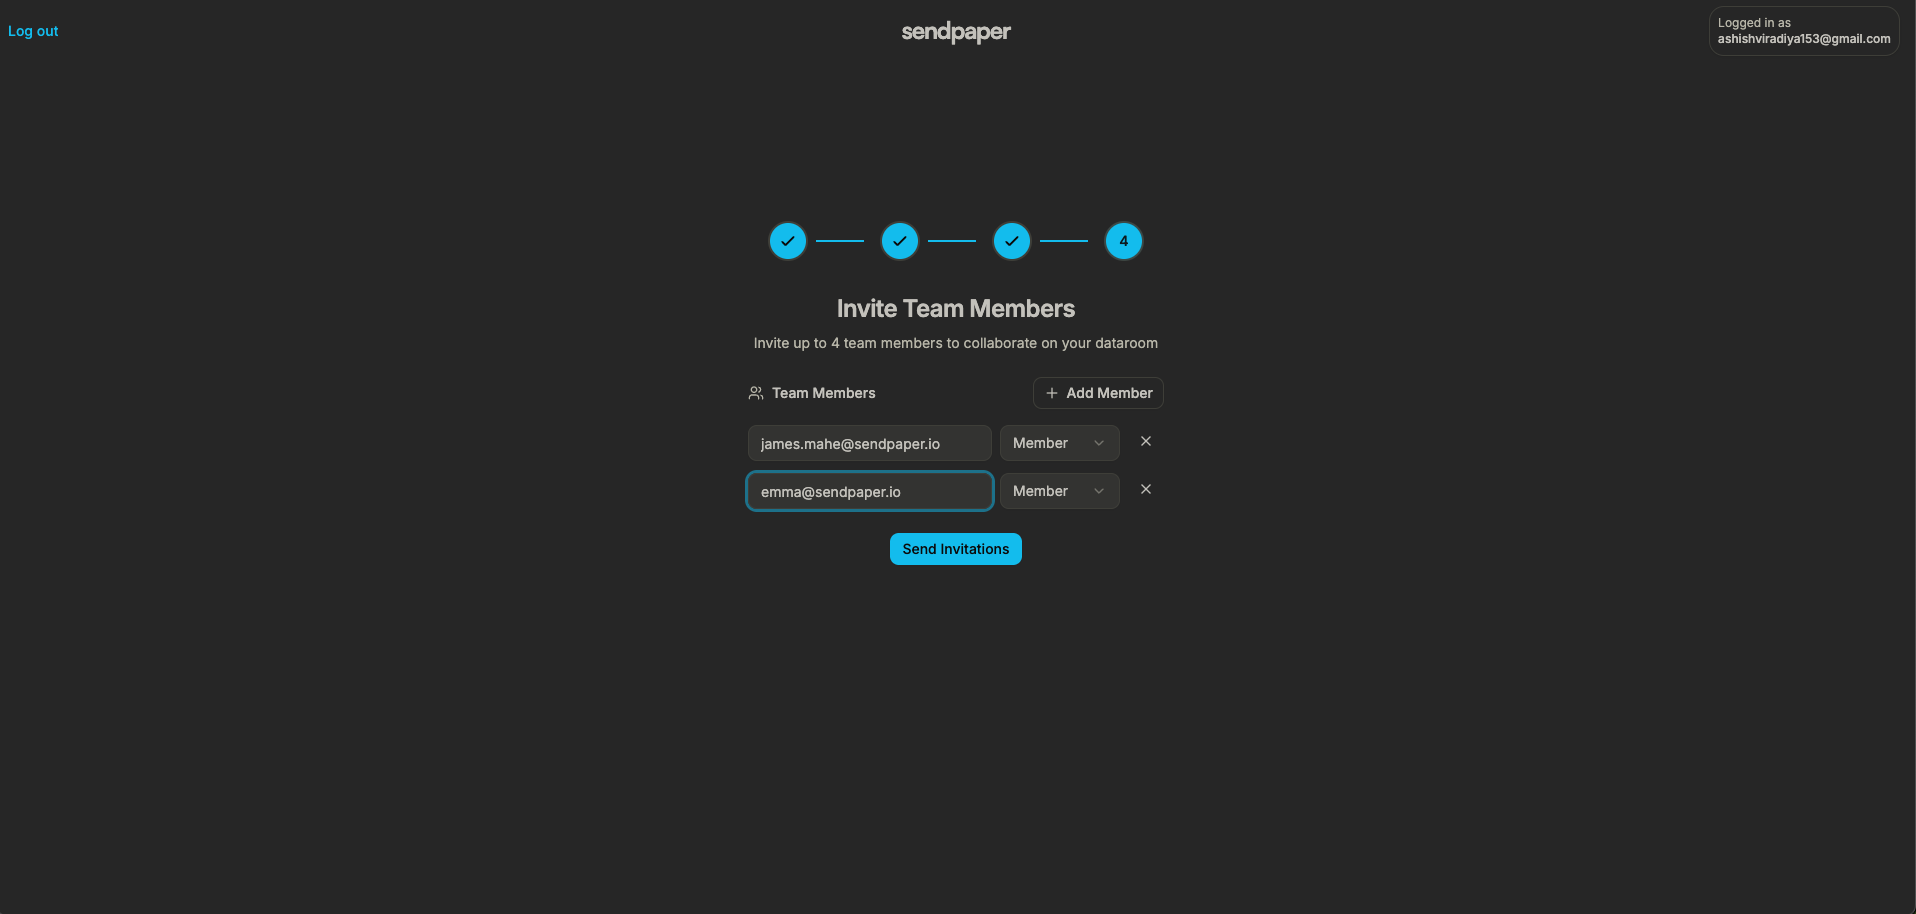
3. Invite Team Members (Optional)
After creating your first data room, you can invite team members to your organization. You will see a screen where you can add email addresses and choose a role (e.g. admin, member). You can invite up to 4 additional members (within your 5 trial seats). Send the invitations; invitees receive an email to join your organization. You can also skip this step and invite people later from settings or from the data room.
Once you finish (or skip), you are taken into your new data room. From there you can add folders and files, create links, and set granular permissions and access control.
What to Do Next in Your Data Room
- Add folders and files - Organize content by folder, upload documents, and set up the room for your deal or process.
- Create a link - Create a link for the data room (or for specific folders, if your plan supports it). Set password, expiry, and email allow/block list as needed.
- Set granular permissions - Control which viewers can see which folders and files. Use granular permissions so each party gets only what they need.
- Brand the experience - Use custom branding so the viewer sees your logo and styling.
- Review analytics and audit logs - Check who opened the link and when. Use the data room audit log for compliance and follow-up.
When your trial ends, you can subscribe to a plan to keep data room access or continue with the Free plan; see Pricing for options.
Frequently Asked Questions
Related posts
- Product, GuidesData Room Groups: One Place for Permissions and Analytics | SendpaperUse data room groups in Sendpaper to manage permissions and analytics for investors, buyers, and teams. Create a group once, reuse it on links, and see group-level activity without spreadsheets.
- Product, GuidesHow Sendpaper renders files as images in the viewer (and why it matters) | SendpaperLearn how Sendpaper converts uploaded PDFs into page images for a fast, consistent viewer. We cover what formats can be shown, what processing means, and why a loader appears.
- Product, SecuritySecure PDF Document Sharing: Watermarking, Screenshot Protection, View-Only | SendpaperShare PDFs securely with watermarking, screenshot protection, view-only, and one-click agreement. Password and access control in Share Link and Access Control. One sidebar, all options.